Saturday, August 27, 2011

3 Leaf Pendant Variation


I made a new pair of green cluster earring this week and I have been trying to pair things with earring and a bracelet or necklace to help with my color grouping a little.  So these earrings came first, but then I started in on a pendant that ended up surprising me.

Sometime last year Deb at our gallery asked me to design a leaf pendant for her.  She is really creative and explained to me exactly what she was thinking when she described a beaded leaf pendant with three leaves.  Hence, the "3 Leaf Pendant" was produced and they have been a very good seller for me. 


As I started in on another pendant, the leaves that I wanted to put together didn't look right hanging symmetrical.  So after some arranging I stitched them together askew and added some accent beads where I thought the gaps were.  I love this new design and hope that you do too!


The Earrings are for sale on my website here: http://www.jennyschu.com/Earrings.html
and the Pendant can be found for sale here: http://www.jennyschu.com/Necklaces.html

Sunday, August 21, 2011

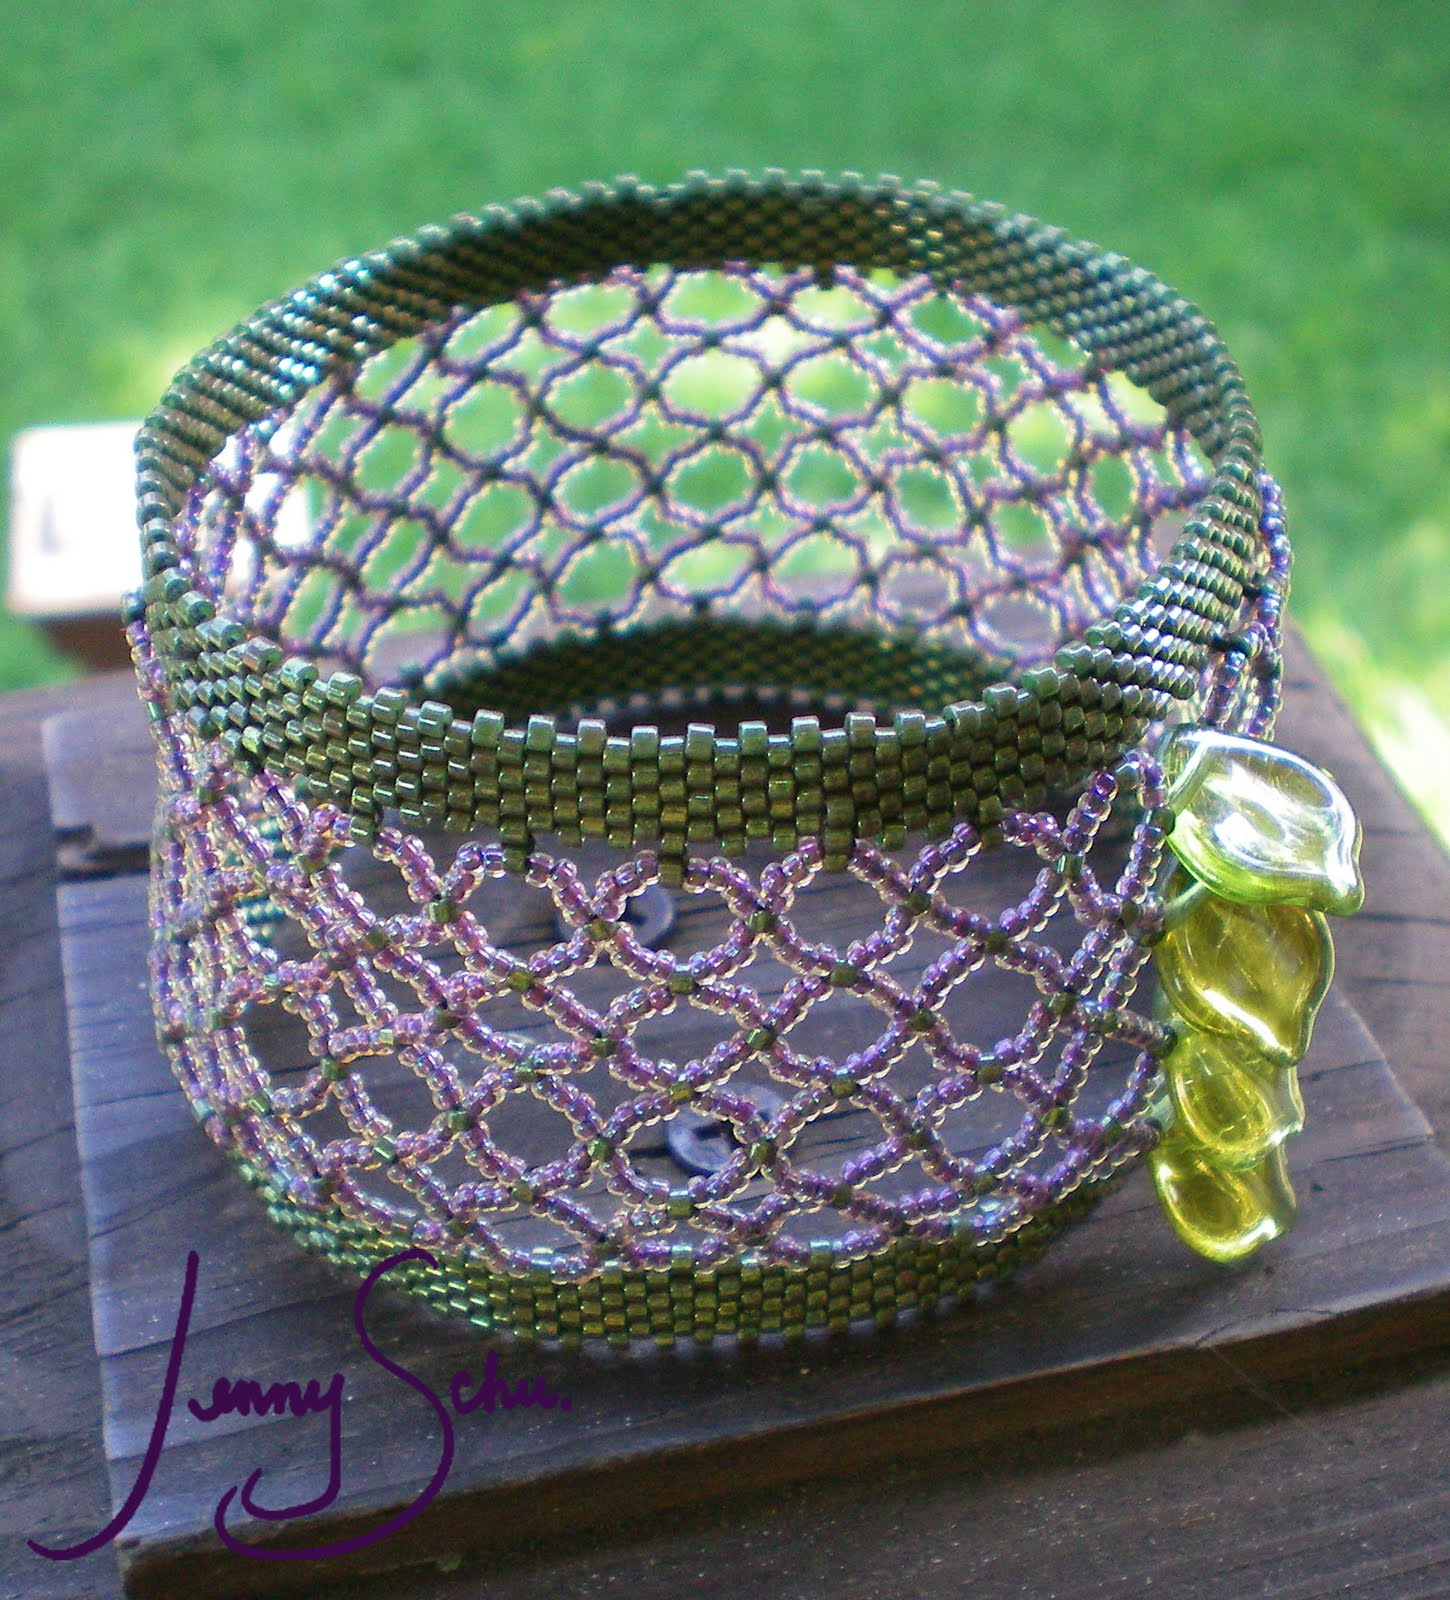
Another Wide Open Bangle

The idea for this particular bangle came from the Blue Wave Diode Bangle in where I used a beaded netting as a base to weave the conductive thread  and LED lights in and out of it.  This green piece began with that same thought process, but as it was coming together, I just didn't want to start putting more "stuff" into it.  It may be that I just wanted the piece done, or it was part of my cleanup of the aftermath of MLH.  I just plunked down with it, noticed the green leaf accent beads that were sitting out and thought "that'll work."


I like the way it turned out.  Sometimes I have a hard time simplifying my designs so I guess being drained this week was a good thing :)


The outside edges of this piece is a green with some rainbow shine which is also accented through the netting.  The main color in the netting is a grey/purple/rainbow tiny seed bead.  The leaf accents have a shiny gold flake on the back side of them.

Thursday, August 18, 2011

Michigan League of Handweavers Conference, 2011

This is the first year I have had the opportunity to stay for the weekend at the MLH Conference and take seminars.  

This year our guild (Greater Lansing Weavers Guild) was inn charge of setting up the Fiberart and Functional Exhibits.  We were given classrooms instead of actual gallery space but I think we got everything hung and laid out the best we could.  Here's some photos from the exhibits:

Fiberart Exhibit


Artist: Barbara Van Dyke


Artists pieces in this photo: Martha Town, Lestra Hazel, Marie Gile, Marilyn Pruka


"Congratulations and Thank you Mr. Finkle"-Martha Town


"Braided Bangle" -Jenny Schu (that's my Second Place award!)


Artist's Pieces in this photo: Pricilla Lynch, Jill Ault


Artists pieces in this photo: Priscilla Lynch, Joyce LaVasseur


Artists pieces in this photo: Loyce LaVasseur, Loretta Oliver


"Theme and Variations" by Bonnie Kay


Artists piece in this photo: Marilyn Pruka, Majorie Mink, Terry Tarnow, Joyce LaVasseur


"Project Runway Grocery Store Challenge: Ms Closure, Ms. Too Too and Candy Girl" Jennifer Gould


Artists pieces in this photo (that you can actually see): Mary Ippel, Joyce Lavasseur, Loretta Oliver


Artists Pieces in this photo: Marla Smith, Bonnie Kay, Mary Ippel


Artists pieces in this photo: Jenny Schu, Marie Gile, Millie Danielson


Artists pieces on the table on the left: Mary Ippel, Lauren Anderson


Functional Fiber Exhibit


The basic set up of the room


Artists pieces on the back blue board: Leslie Johnson, Catheine Roberts


"Symbols" by Bonnie Kay


"Lemon and Lime Kitchen Towel" by Ellen Wilson


Atists pieces shown here: Ken Allen, Nanck Peck


"Midnight Sky" Rya Rug by Catherine Roberts


Artists pieces shown here: Nacy Hedburg, Anne Flora, Andrea Anderson


Pillow: Priscilla Lynch


Artists pieces hown here: Priscilla Lynch, Marla Smith


All three of these are by Janet Peters

I'd like to apologize for the photography.  I remembered to take these photos last minute, with my phone.  I'll do better next time!  Thank you to all who entered and congratulations to all who won prizes!!!!

Saturday, August 13, 2011

Bead Shopping and Bead Books.

I get asked a lot what my sources are, where I purchase my beads, etc...  I needed to make a handout anyway for upcoming classes, but it should be general knowledge of my personal favorites.  So here they are:


Where I purchase my beads:

Fire Mountain Gems (online)

www.firemountaingems.com

-This is my main source for my seed beads and supplies. If you sign up for an “account” with them then you can save your cart as long as you like. The price goes cheaper per-item that you purchase (15, 50, 200 quantities...) The cart is particularly awesome for when I notice I’m running low on a supply but don’t need it quickly.

Bead Boutique: Lansing, MI

www.beadboutiquelansing.com

-I go here in a pinch (it’s a mile down the street from me). Barbara is fantastic and very knowledgeable. She also will do really cheap one on one classes as long as you purchase the supplies from her.


Bead Gallery: Ann Arbor, MI

http://bga2.com/

-I have been going here regularly since my college days. They don’t have the seed bead collection that Findings does but if you love gemstones and accent beads, and want to see them in person, go here. They are really specializing in gemstones and have quite the offering.


Findings: Ann Arbor, MI

www.beadseekers.com

-Seed beads seed beads seed beads! Go here if you’re looking for specific colors, you’ll be able to find it. They also have a much better selection of 15/0 seed beads than Fire Mountain Gems, so I sometimes have to take a bead trip here.


Books:

There are 2 books that I use on a regular basis. I use them for patterns and problem solving my designs.
1) Indian Beadweaving Patterns by Horace Goodhue

-I have owned this book since I was in the 4th grade. It was my original go-to book. You have to read the instructions, but they are very thorough. Horace Goodhue actually studied with Native American tribes and wrote this book.

2) The Art and Elegance of Beadweaving by Carol Wilcox Wells

-This author was suggested to me and you can find her books on Amazon way below suggested retail. I really like this book because of all of the options it has for beadweaving stitches.

Friday, July 29, 2011

Peachy Bangle and Necklace

I finished this bangle a month or two ago and then the necklace I started was left in the dust behind a trail of yarn and weaving on my loom.  I picked it back up and finished it last week though. 


This will probably be the end of "summer-y" pieces as I'm already looking to the Fall Fashions because they have wonderful purples coming in!  (Purple is my hands-down favorite color)

So enjoy this last little blip of my summer beadwork, watch for it over at Grove Gallery before I swap it out in the next few months! For my usual darker-color themed pieces.

Tuesday, July 26, 2011

Beadweaving into your Weaving.

I'm starting to play with this technique just within plain weave, but you can really insert beads into any type of warp, anywhere in your warp. 

What you need:
Beading thread (I use nymo size D)
Beading Needles (I keep a 2 inch size 10 and a 2 inch size 12 on hand)
Seed beads size 11/0 (you can really do any size, but this is a good starting bead, I am using "Dyna-Mites" with this piece, they have an easy hole to pass through multiple times)

I am weaving off a plain-weave scarf and deciding to place a row of seed beads in every 6-8 inches.  I start with a length of thread about 3 times the width of my warp.  This is because you will be passing the beading thread through twice to put it into your warp and you definitely want extra so that you're not struggling with the needle falling off the end of your thread.  My warp is about 14 inches wide, and I'm putting on around 150-160 seed beads. You won't need the exact width of beads to the warp because the warp threads will be in between your beads spacing them out as you go.

1) To start, thread your needle (do NOT double over your thread) place an "anchor bead" on the end of your thread.  You will slide 1 seed bead toward the end of your thread, leaving at least a 4 inch tail.  Tie an overhand knot around the bead, holding it in place.  We will be pulling this bead off later, so don't double knot it.


2) Thread on enough beads to go across your warp. (Mine is about 155 beads give or take a few, it's better to have more than less, we will remove extra at the end.)


3) Find the middle of your beading thread.  Slide the last bead (opposite end from the anchor bead) on to the middle of your thread.  Lay into the right side of your warp. (I'm right handed and will be working right to left of my warp for this.) Depending on how tight your selvage is, you will place the bead between the very end thread and the one to it's left, OR place the bead 2 spaces in. 


4) You are then going to go around the outside of your warp thread(s), to the underside of your warp and through the bead from the bottom.  Then pull the thread up to the top of your weaving through the warp threads so it looks like below:


5) From here, you take your needle, pull it under and up through the next warp thread (on my left), and then thread through the next bead on the strand.  Repeat all the way across your warp but as the beads start to squish the warp out of place, thread under 2 warps, pick up a bead to even it out.  See images below:


6) When you have gone all the way across your warp, you will probably have beads leftover on the top thread.  Tug the knot out of the "anchor bead" and remove all excess seed beads.

7) Now tie together your top and bottom thread in a square knot, and with the beading needle (sometimes you need a smaller needle), pull the 2 threads back through the seed beads on your warp to secure them in (not all the way, just in 2 inches or so).


8) Cut the ends that you've threaded back through the beads close to hide them in the beadwork.


This is the most-basic version of beading into a warp.  There are so many things that can be done with your weaving and this technique can be used multiple rows at a time, randomly though your warp, etc.  One of the reasons to use this technique is it will show on both sides of your weaving and it will stay securely in place.  If you'll be washing your piece make sure to test that the beads wash well also.  Some finishes don't do well when heat or water is applied.

Most of all, Have Fun!!!

Thursday, July 14, 2011

Beaded Flower Hair Piece


Funky fancy hair pieces have been in for a while, and I keep getting requests for them, but never any actual orders.  As much as I am happy to do commissions, I really prefer to make things that I would wear, since I am my own biggest promoter.  I am generally wearing something that I made when I am out of the house. So it has taken me a long time to get into the idea of working with this trend, and I think I may have missed the boat on it.  The single flowers seem to be getting bigger and heading toward facinators, but I have had these little hair clips and am jumping into trying them out, finally.


Part of the reason I got inspired to do this little hair flower is that I feel I have finally have mastered the Russian leaf and the variations that I learned from the class I took with Huib Petersen in 2010. (See blog "Beadweaving with Huib Petersen")  I now need to move on from the individual petals/leaves over to seamlessly connecting them to create even more dimension.


I have in now way mastered the combination, and I prefer to do things from memory and experimentation so it will take a bit. I am pretty happy how this first one tired out since I have not really addressed the pattern since the class.  I finished it while I was at the Soup Spoon Cafe post-lunch meeting!


This piece is approximately 2.75 in x 2.75in x .5 in.  The clip is about 1 in x .5 in.  I chose this particular clip because it will actually stay in my very thin hair rather then messing with a hair comb!  This size will be running around $65

Note: I did purchase an adorable hair flower in for a dinner party last year which was perfect from Pixel & Hank.  They're very cute, reasonably priced and a Michigan crafter!  I just had a hard time making one myself!

HGA Convergence in New Orleans, 2026

We were SO excited when HGA announced that Convergence was in New Orleans for 2026. It is a city that my husband and I have talked about goi...